Advanced Electrical: Diodes
Clark February 7th, 2017
The most common diodes on boats these days are LEDs, Light Emitting Diodes, which are changing the way we light our boats and use energy. They’re great! There are all kinds of specialty diodes in the electronics world, but the kind of diodes I’ll discuss here are basic, simple old diodes, the kind you could buy at Radio Shack for thirty-five cents, if Radio Shack were still in business. I always keep a few diodes in my box, because they provide a magic solution to some very specific problems.
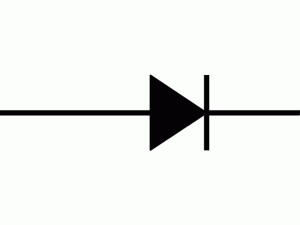
Diodes are one-way valves for electricity. Place a diode along a wire and electricity will flow one way down the wire, but not the other. If you connect an LED the wrong way it won’t light up; connect it the proper way and voila. Above is the electrical symbol for a diode, and as you might guess, the arrow points in the direction of current flow. Current can’t flow against the arrow.
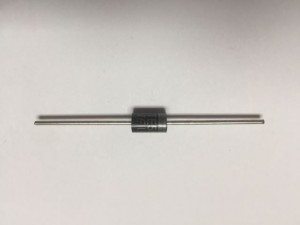
It’s good to know the symbol, and basic symbols for switches, fuses, and the like, because when considering a diode to solve a problem, diagramming the circuit first really simplifies the matter. An actual diode looks like this, and the silver band is the cathode end, that is, the end the current flows out of, but not into:
There are several common situations when I use a diode on a boat. The first is when I’m installing a light like this:
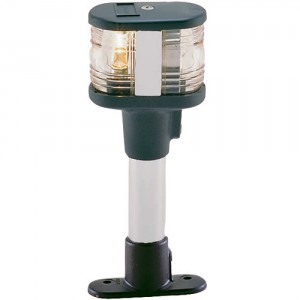
It’s got a bulb in front, and one in back. When you want it to be an all-around light, or anchor light, you power both; when you want it to just be a steaming light you only power the front bulb. Sounds simple, but it’s not so simple. Since the the two bulbs share a negative wire (three wires, not four, lead into the assembly) you’ll quickly find it’s hard to separate them: Both bulbs will light together when you only want the steaming light.
The simplest way to avoid this is by using a DPDT switch (Double Pole Double Throw), a switch with ON-OFF-ON settings and various terminals for isolating the various loads. Turning this switch to one of the ON positions gives you your all-around light; turning it on in the other gives you your steaming light, maybe along with the nav and stern lights. But sometimes this setup isn’t practical, and many electrical panels come with one switch for an anchor light and one switch for a steaming light. Enter the diode.
By placing a single diode in this circuit you can make your two switches do what you want them to do:
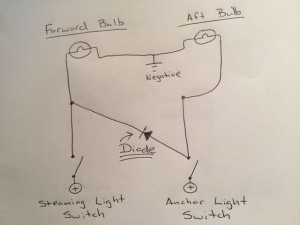
If you follow the circuit you can see that without the diode, unintended current would flow from our steaming light circuit to our anchor light circuit and make the aft bulb light up too. If, in the same circuit, we had nav and stern lights connected to our steaming light switch, then they’d light up when we turned on our anchor light. A second diode would prevent anchor light current from flowing to our nav and stern lights.
Another common use for diodes is for engine alarms. The standard setup is to have a light/buzzer that goes off when you’ve got high water temperature or a drop in oil pressure. Well, which is it? It would be nice to know at a glance whether the alarm is from high temperature or low oil pressure, and to have a separate light for each. Depending on the way the panel is wired, you’ll sometimes get the same problem as with our pole light, both bulbs lighting when you only want one, and a diode can isolate them.
Electricity can be sneaky, especially on engine panels and distribution panels where you’ve got a lot going on in the same place. Sometimes, even in a well-designed and well-built panel you’ll get a sneaky phantom current that makes bulbs glow dimly or buzzers/beepers make irritating noises. Again, simple placement of a diode can solve the problem without completely dissecting your handiwork.
Also found on boats are solar panel blocking diodes: Solar panels “leak” a bit of juice at night, so the blocking diodes prevent this back flow. Solar blocking diodes (indeed all diodes) add some resistance to the circuit, reducing the panel’s output somewhat, so the day/night balance ends up being about a wash.
Basic diodes usually have four different ratings, most of which can be ignored for our purposes. I always use NTE5800 diodes, which are rated for up to 3 Amps of current. I know I’m never going to have more than 3 Amps, because I’m always solving problems like those above, with small bulbs, buzzers and the like, in 12 or 24-Volt DC systems.
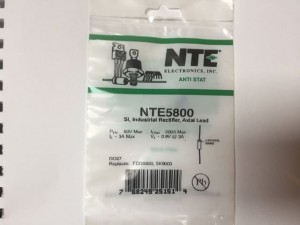
The NTE5800 diode takes .9 Volts to “turn on,” that is, to function, and I’m always going to have that in a 12 or 24-Volt system. It’s rated at 200 Amps to break it, that is, the amount of reverse current to make it fail and not block. 200 Amps ain’t gonna happen either. It also has other ratings for the amount of abuse it can take in either direction before it fails, but these aren’t ever going to happen in my applications. I just need to remember it’s good for 3 Amps, and if I ever try to do something exotic I might need a different diode.
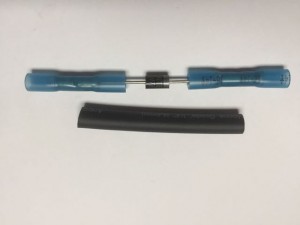
In practice I like to install diodes using two heat shrink butt connectors to connect the diode’s two leads to wires. The leads on the diode are live and exposed, so I always then cover the whole thing with heat shrink tubing, both protecting from accidental shorts and waterproofing it (I think they’re waterproof anyway). Then definitely label it on the outside with some kind of label (white heat shrink tubing works well), otherwise it will just look like a mystery blob inside some heat shrink tubing. It’s also very easy to bend the terminals on the diode, insert them into two of the terminals on a screw-down terminal block, then connect your wires to the opposite terminals.
