Metal Tank Repair with a Shop Vac
Clark April 12th, 2017
One of my boat’s stainless steel water tanks has always had a hole in it, and a series of patches, the last of which held for twenty years, until it failed last week. Here are the tanks, under my floors and settees, meaning replacing them is out of the question, or at least worth a lot of time futzing with patches:
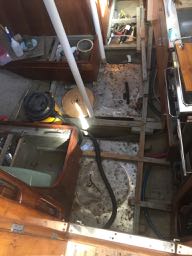
After circumnavigating for ten years on an old boat with not only a water tank with a hole in it, but steel fuel tanks with holes in them, I’ve developed a more nuanced approach to patches. I made it over three years with the bottom of a fuel tank patched with JB Weld, a fortified epoxy product. I’ve had very good luck with small repairs with JB Weld, and I always keep some aboard:
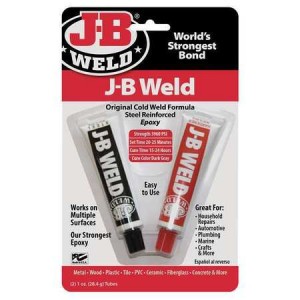
Obviously if you get into bigger repairs where some structure is needed, regular liquid epoxy, fillers, and fiberglass are better, although I’ve also had good luck with small pieces of fiberglass impregnated with JB Weld. Point being, patches, done right, can be very solid, adding years to the lifespan of a tank, or at least getting you to your next port where a replacement, or welded repair, can be made. But the patches have to be done right, not rushed, with meticulous attention to detail.
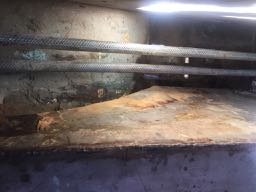
Back to my water tank. Here is the part with the leak, and the leaky patch in place:
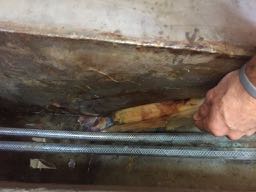
Here is the entire patch coming off in one piece, which tells me that epoxy doesn’t stick very well to stainless steel, even if it did last twenty years:
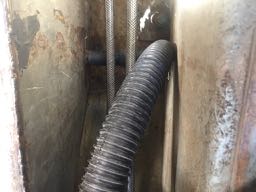
On to the shop vac and my more nuanced approach to repairing leaks. First, empty the tank, or at least get it well below the level of the leak. On most shop vacs you can attach the hose to a different orifice and turn it into a blower. Turn it into a blower and attach the hose to the tank. Some tank testing procedures call for pressurizing with compressed air up to 3 PSI, but we don’t need to go that far, just enough to force a little air out our leak(s). Here I’ve got the hose loosely attached to a tank fitting. I didn’t need to close off the vents, tape it, or take any other measures:
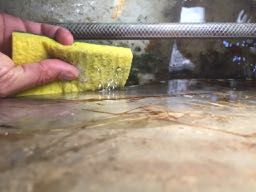
With the tank pressurized I could go around with soapy water, looking for bubbles and pinpointing my leak:
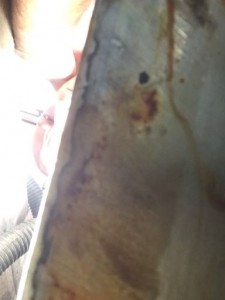
It turned out to be an invisible crack in a weld, about half an inch long, visible with a mirror, or by shoving my iPhone down there:
Now that I’d precisely located my leak, rather than slathering a whole corner of the tank with epoxy, I could pinpoint my repair. As anyone with a boat knows, tracking any kind of leak can be very frustrating. General wetness, be it water, fuel, oil, or whatever, is never a precise indication of where the problem lies.
Sand, sand, and sand some more. You want to key the metal as deeply as possible to give the adhesive something to bite into. I was going to go at it with a 16 grit disk on an angle grinder, but I couldn’t fit the angle grinder, so I sanded by hand with 60 grit. With metal, you must make it bare and shiny. On steel you may get to bare shiny metal, but still have some black spots. These black spots are rust seeds, and they will grow into rust trees and destroy your patch, or lift up your paint if you’re painting. The black spots must be removed. With aluminum, remember that the surface oxidizes minutes after sanding, so move quickly. Bare, shiny metal.
Now it’s on to three things, in whatever order works:
1. Heat the area with a heat gun or torch, enough to cook the moisture out of the crack or hole, and dry the inside of the tank:
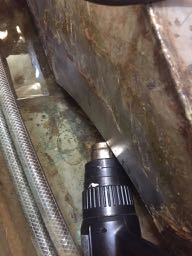
NOTE: If you’re repairing a fuel tank, don’t use a heat gun or torch! Welders insist that there not even be a whiff of fuel smell – gas or diesel – before welding a tank. If there’s fuel present, might opt for a day of drying, compressed air, or some other method to dry it out.
2. Switch the shop vac to suction mode and put the whole tank in suction.
3. Clean the area with acetone. When metal looks shiny and clean, it’s still dirty and greasy, so keep cleaning with acetone and fresh paper towels until your paper towel comes off spotless:
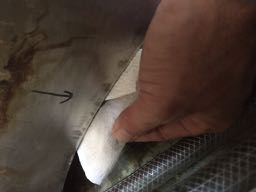
If no fuel danger, mix your epoxy or JB Weld, keep the tank in suction, and keep it hot. At 140 degrees F you can keep your hand on metal for about two seconds before having to move it. This is about right. You don’t want to fry your epoxy. Heat will lower the viscosity of your epoxy and let it flow better, so that with the warmth and the suction, some of your goop will be drawn to the inside of the tank, or at least into the crack or hole. By keeping it warm and spreading it thinly, I could see with a mirror as the JB weld dimpled into the crack.
Turn the shop vac off and slather your patch area on the outside.
Obviously if you can get to the inside of the patch, clean the inside to bare metal and attack from both sides. This was the case with the patch in the bottom of my steel fuel tank, the one that lasted three years, until I got new tanks. On my water tank there are baffles in the way.
Four hours later, after the first layer had begun to set, I laid on a second, wider layer of JB Weld, just for good measure. The next day I filled my tanks, and my bilges have since remained dry:
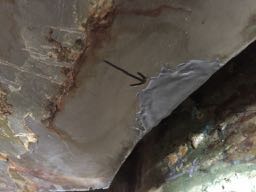
I think the shop vac makes a big difference, of course combined with meticulous prep work and cleanliness. By pulling material into the leak you’re repairing the actual breach and keying some material into it, rather than coating over it. When you just coat over it you’re relying entirely on the adhesion of the goop to bare metal. I’m guessing this patch will last another twenty years, or more, and if any other small leaks crop up I’ll go through similar exercises many times before I consider the huge expense, and gargantuan task, of replacing the tanks.
Good and timely post! I’ve got a related issue on my Salar, Circadian. I’ve had a mysterious groaning sound whenever the boat heeled or rocked. FINALLY tracked it down. I think one of the water tank baffles is loose or is working and rubbing. Haven’t drained and opened it up yet tho. Ever run into that? Any ideas? Think JB weld might work?
I’m cruising Mexico now…in La Cruz heading for Nuevo Vallarta. Latest in my blog the-vessel-circadian.blogspot.com
Best to you and yours!
George
Hi George! I just checked out your blog and all your great photos. I’m glad you finally made it out of Ventura. Salar 40s are meant for the high seas! The baffles on my water tanks were detached in several places. I know, because part of this large, water tank-related project was to clean out the water tanks as best I could. The water wasn’t tasting very good, despite my charcoal filter. I scrubbed them where I could, and pumped out many tankfuls of skanky water, but beyond the baffles the best I could do was blast with a stream of water. Anyway, may tanks expand and stretch when full, and do all kinds of weird things, so would surprise me if a loose baffle sounded like a dying moose while at sea. Cheers, Clark
Thanks for the great blogging, we are also in the same in this business and you can contact us for any help. Thank You.