Clark May 28th, 2015
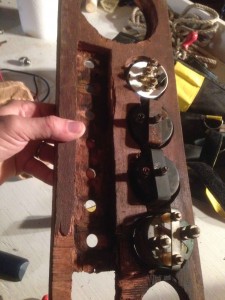
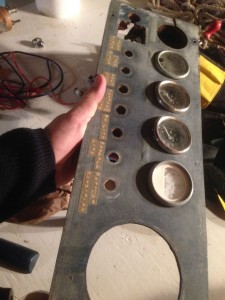
This is the project that started with a new steering wheel, but I’ve drifted to far from the new steering wheel that I’ve almost forgotten that that’s how I started. There is a running theme to this project run amok and it goes like this: After disassembling things to get done what I needed to get done, the disassembled components were in such sad shape that I couldn’t, in good conscience, put them back. This started with peeling wood veneer, which necessitated rebuilding the entire steering console, and now I’m into the wiring. It’s a bit of a cobblers children without shoes scenario: Here I am a marine electrician, but much of my boat’s wiring was a mess. This is attributable to several factors:
1. I’m still finding original wiring, as in, installed in England in 1967, and I thought I’d routed all of it out by now.
2. I’m still finding wiring done by former owners of the boat, like with lamp cord, and I thought I’d routed all of that out too.
3. I redid a lot of wiring before I set out to circumnavigate, but I wasn’t the electrician I am now. I didn’t do anything I’m too embarrassed about – everything was electrically sound – but good wiring, like good computer code, should be both functional and easy to read. My wiring was very functional, but not easy to read. And I worked around the original buses and other components, which I should have just ditched. Better stuff is available now.
4. The ABYC standard has changed, and things that were allowed before aren’t allowed now.
One of my nasty, 50-year-old bus bars:
I find with these major wiring revamps it’s best to start big and work toward the small. So, start with batteries, battery cables, and battery switches first, then something like the wire to the reading light over the port pilot berth would come last.
Looking at my battery cabling, most of which I replaced about 18 years ago, all the wire was still in good shape, but many of the lugs were looking sad:
If I cut off the old lug and stripped the wire back, the 18-year-old wire was indistinguishable from brand new wire. And since this is all 1 gauge, 2 gauge, ad 1/0 gauge, which costs around $5 per foot, using the old wire saved hundreds of dollars:
On the left is 18-year-old wire; on the right is brand new wire. If it weren’t for the slight change in insulator color, I wouldn’t be able to tell the difference.
Simple process: lop off the old lugs, strip the wire back, crimp on new lugs, seal with heat shrink tubing, and that’s it. This is why we should always leave “service loops” in our wiring, to have that little extra so you can lop off a few inches and still have enough to get from A to B.
New lug:
And new heat shrink tubing:
This is also a good testament to tinned wire. Marine wire must have several properties: it must be stranded, instead of solid like home wiring, so it will be flexible and not fatigue with the endless cycles of flex and vibration on a boat. It must have flame retardant water and fuel-proof insulation (in jaunty colors). And it must be tinned. Copper is a much better conductor than tin, but the tin coating is well worth the minor conductivity loss because the tinning makes the wire much more resistant to corrosion. Pure copper, in the marine environment, will turn to green dust in a few years, even inside good insulation. Tinned wire seems to last a long time – at least 18 years anyway.
The heat shrink tubing is very important too. Without it, moisture can find its way into the insulation and track down the wire. I credit heat shrink tubing partly with my wire’s longevity.
There is one other good thing about tinned wire. In my ABYC accreditation class a lively debate sprang up about the best way to crimp lugs. The right answer for the test was “a box crimper,” some thing big and cumbersome, like this:
The founder of Ancor marine was in the class, as he was a member of the ABYC standards board and he had to get recertified himself. He showed us that an impact crimper does every bit as good a job of crimping a lug, and under the intense pressure of a well-crimped lug, the tinning on the wire actually cold welds to itself and the lug, making a very solid, low resistance connection. He crimped a lug that night, sawed through the middle of it with a hack saw, and brought it to class the next day. Indeed, it appeared to be cold welded.
Therefore, I will always use the much cheaper and more compact impact crimper, and my 4-pound sledge (of the broken thumb):
So, new lugs on all cables, using mostly the old cables.
The next item was to protect all the high amperage cables with fuses. In the good old days we didn’t do this. The standards allowed the cables between batteries and battery switches to be unprotected and 90% of the boats I work on are still this way. There are several cases where you’re allowed to have an unprotected wire under the ABYC standard, but they’re few. In general, every wire should be protected.
Obviously it doesn’t make sense to fuse, say, a wire like this:
When you look at the statistics, boat fires are a common way to lose a boat. More than half of boat fires are caused by faulty wiring. Anyplace a fuse can blow instead of letting a wire heat up to red hot is potentially a fire averted.
As a marine electrician I’ve seen enough fried wiring, shorted cables, and a few blown-up batteries to have the bejesus scared out of me. A short in a big battery cable would be terrifying and catastrophic, so big fuses on each positive battery cable, and on the cross-connect cable from my starting battery to my house banks. I can’t remember exactly why, but in my ABYC class Kevin Ritz, the Papa Bear of marine electrical systems, cast aspersions on ANL and AMG fuses, the other options for high amp fusing, and recommended only the robust and fabulously-expensive Class T fuse for this purpose. So I went with Class T fuses and fuse blocks at about $40 per fuse block and $25 per fuse, but these are fuses you hope you’ll never blow.
Class T fuse and fuse block in place:
Some still debate whether you should fuse your starting circuit, that is, the connection from your starting battery to your starter. There’s no debate: you should fuse it. The ABYC allows an exception here, but the ABYC standard covers boats up to 100 feet, and some of these big boats have big engines with big starters, which can take 500-1000 Amps to crank. There’s no practical way to fuse something for over 500 Amps, and this is why they allow the exception.
For the rest of us mortals our starting loads won’t be anything like that. There may be a transitory spike, but this will only last milliseconds, and these big fuses would take a second or two to blow. I’ve got my starter wired with 1/0 wire and a 350 Amp fuse. To blow a 350 Amp fuse, something would have to be catastrophically wrong, like dropping a wrench across the two terminals on the starter. Since I’d be the guy dropping the wrench, probably wearing a bathing suit, and initiating the shower of molten metal and exploding battery acid that would scar me for life, I went with $75 worth of protection.
The standard says the fuse should be within seven inches of the battery terminal, or it can be within six feet if the wires are run within a protective sheath. Within seven inches means stuck to the battery box, in my estimation, so that’s what I did. The covers are just as important as the fuse blocks, because once you got one of these things on the side of a battery box, that’s a whole lot of surface area of live juice, just begging for an errant swing of a wrench:
So if I’m starting with the big stuff and moving toward the small stuff, I now have solid connections between my batteries and battery switches, via re-terminated cables with new lugs and new heat shrink tubing. And each of these connections is now fused with a high amperage class T fuse.


